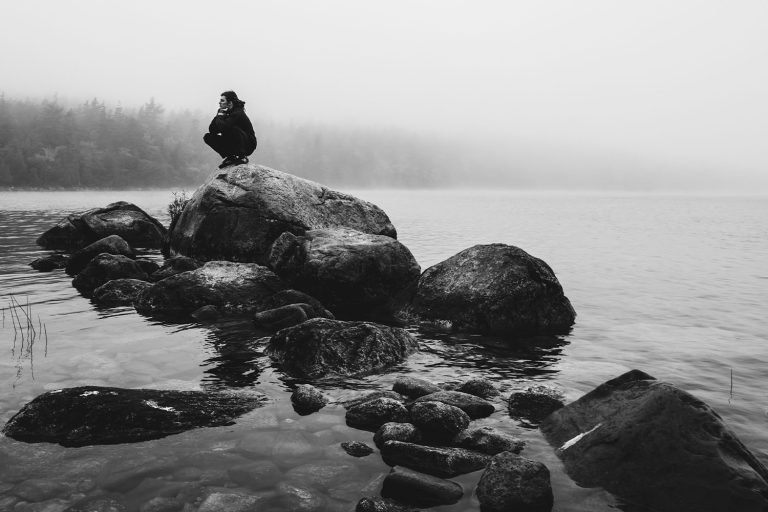
Black and white photography is a classic genre that allows you to focus on shape, texture, contrast, and emotion,
eliminating the distracting effects of color. The shooting process for a black-and-white image is not much different from a color


Shooting process and preparation for a black and white shot
It’s not recommended to shoot directly in black and white – it’s better to take a photo in color and then
convert it in a graphic editor. This gives you more flexibility when processing, as you can control
When shooting, think about the future black and white result: look for scenes with pronounced contrast, interesting textures
and shapes. For example, old buildings with rough surfaces, portraits with expressive wrinkles, or landscapes with dramatic
clouds are ideal for this genre. Avoid scenes where color is a key element (for example, bright flowers
To learn how to see the black and white world, practice: shoot the same scene in color and imagine how it would look without color. Over time, you’ll start to notice where the contrast is stronger and where the picture loses its meaning. This skill is the key to creating powerful black and white photos.
Using filters in black and white photography
In classic black-and-white film photography, filters were indispensable for controlling contrast and tones. In the digital
For digital cameras, classic color filters are not suitable due to the characteristics of the sensor and color reproduction. Instead,
Neutral gray (ND) filters are useful for extending shutter speeds without changing color, allowing you to capture blurred
movement (such as clouds or water) even during the day. A polarizing filter eliminates glare on water or glass and saturates the sky
The main rule is that the effect of the filter should not dominate – the story and composition always come first. If you plan to convert a color photo to black and white, avoid using color-enhancing or conversion filters while shooting. Neutral filters can be used freely, while polarizing filters are only used for specific tasks, such as removing glare.
Convert a color photo to black and white
Processing begins with high-quality retouching of the color image: correct defects, noise, and exposure. For conversion, it’s best to
Tone correction is a key step. If you’re correcting a color photo, you may need to do some additional
Additional tips: Increase contrast for drama, but avoid going overboard to avoid losing detail in shadows or
highlights. Use local adjustment tools to highlight key elements. For example, darken the background to make the
Black and white photography is not just about the absence of color, but a way of telling a story through light, shadows, and shapes. Shoot in color, but think about contrast and texture; mimic the effects of filters in post-processing; practice to see the world in gray. With experience, your black-and-white images will become powerful, emotional, and timeless – just like the classic masterpieces of photography are remembered for.